Blog

  • From Messy to Mastery: Practice Lip Tint Like a Pro with Latex

    Are you tired of uneven lip tint, messy application, or feeling unsure about achieving that coveted effortless look? Many women struggle with lip tint application, leading to frustration and wasted product. What if there was a simple, mess-free way to hone your lip tint skills, build confidence, and master various techniques without touching your actual lips first? Introduce yourself to the game-changing technique of practicing lip tinting on latex!

    In this post, discover the benefits, essential materials, and step-by-step process of using latex for lip tint practice. This method will transform your beauty routine, allowing you to achieve a perfect lip stain every time.

    Why Latex? The Secret to Stress-Free Lip Mastery

    When it comes to refining your lip makeup artistry, particularly with popular lip tints, traditional methods often fall short. Practicing directly on your lips can be messy and waste precious product. Applying to your hand or paper doesn’t offer the realistic texture needed for effective training. This is where practicing lip tinting on latex shines as a superior alternative.

    The benefits are manifold. Using a latex practice skin means no waste of your expensive lip tints, allowing for endless experimentation. It’s truly mess-free, eliminating concerns about stains on skin or clothes. This freedom encourages you to try out new colors, techniques like ombre lip tutorial, gradient, or full coverage without commitment. This method helps build muscle memory, developing a steady hand and precise application. The realistic texture of latex mimics skin, making it ideal for beginner makeup skills. Most importantly, it boosts confidence, allowing you to perfect your skills privately before applying directly to your face for that effortless lip look.

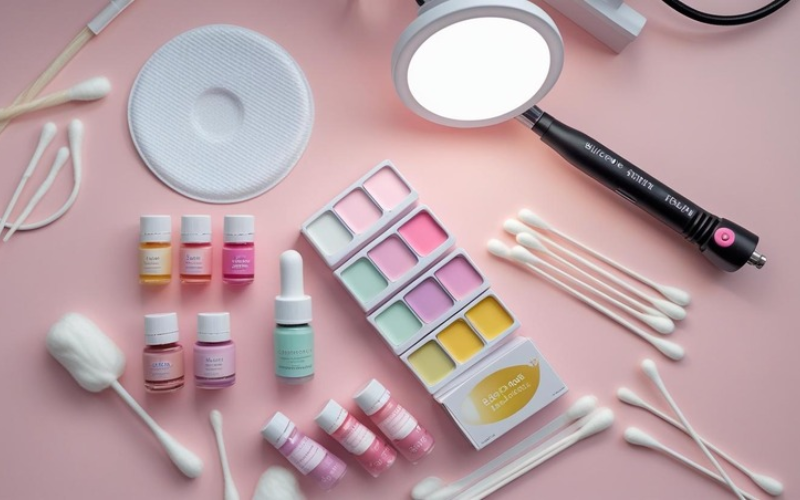
    Gather Your Pout-Perfecting Toolkit: What You’ll Need

    Before you dive into perfecting your lip tint application tips, assemble a simple toolkit. The beauty of this DIY beauty hack is its minimal requirements, making it accessible for everyone.

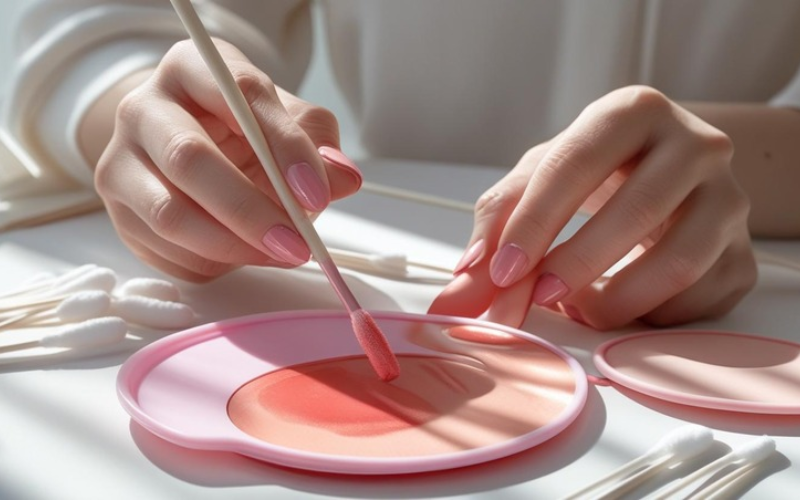
    Essential materials include latex practice skin. Plain sheets offer more versatility for drawing various lip shapes, though pre-drawn lips are also available. Gather your favorite lip tints and stains, whether they’re liquid, gel, or balm types. You’ll also need various applicators: lip brushes for precision, cotton swabs for blending and clean-up, and the doe-foot applicators that come with many lip products. While optional, a mirror can be useful for self-reflection on your technique. Lastly, keep makeup remover or wipes handy for cleaning both the latex and your brushes.

    Pro Tip: Affordable latex sheets are readily available. Check beauty supply stores or popular online retailers to start your practice journey without breaking the bank.

    Step-by-Step: Mastering Your Lip Tint on Latex

    Ready to transform your lip tint application? Here’s how to get started with practicing lip tinting on latex.

    Begin with preparation. Ensure your latex sheet is clean. If your latex isn’t pre-drawn, consider sketching a lip outline with a fine-tipped pen. This provides a clear boundary for practice and helps maintain consistency in your shapes.

    Now, explore various application techniques:

    • Basic Full Coverage: Focus on achieving an even application across the entire lip area, paying close attention to defining the edges for a crisp, clean finish. This is fundamental for any natural makeup application.
    • Gradient/Ombre Lips: Experiment with blending two shades. Apply a darker tint to the outer edges and a lighter one towards the center, or vice-versa, then gently blend for a seamless transition. This helps avoid common lip tint mistakes.
    • “”Just Bitten”” Look: Concentrate the color primarily in the center of the lip and softly blend it outwards for a subtle, diffused effect that looks effortlessly natural.
    • Correcting Mistakes: This is a crucial part of beauty silicone practice. Practice cleaning up any smudges or uneven lines using a cotton swab or a small brush dipped in makeup remover. This skill is vital for real-life application.
    • Layering Techniques: Learn how to build intensity by applying multiple thin layers of product rather than one thick coat. This often leads to a more durable and vibrant result.

    For effective practice, use light pressure with your applicators. Always start with less product and build up as needed. Focus on precision and symmetry in your strokes. Observe your angles and hand movements to gain better control. Remember, practice makes perfect – rinse and repeat as many times as you like!

    Beyond the Basics: Elevate Your Lip Tint Skills

    Once you’ve mastered the foundational techniques of practicing lip tinting on latex, it’s time to push your boundaries and refine your lip makeup artistry even further. This is where your self-care beauty routine truly becomes a creative outlet.

    Consider advanced practice ideas. Experiment with different lip shapes that aren’t your own, like fuller or thinner lips, to broaden your skill set. Diligently practice correcting uneven lip lines, a common challenge many face. Integrate lip liner practice to see how it can enhance and define your tint application, creating a more polished look. 

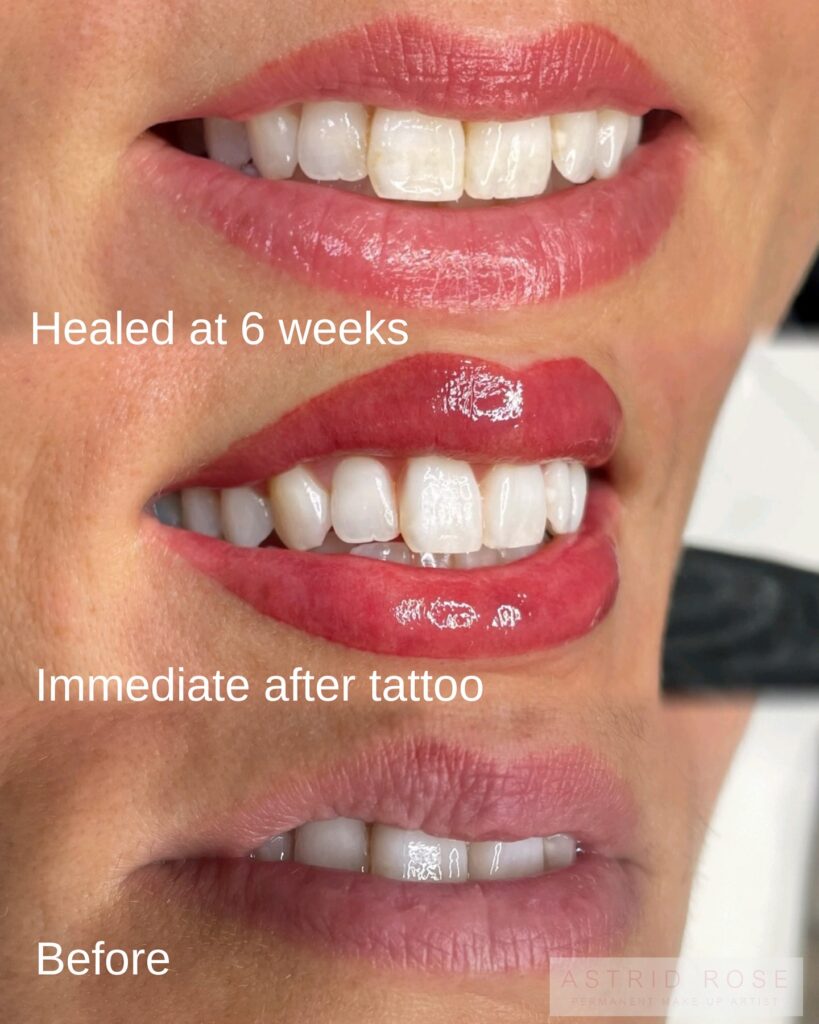
    Try out different brands and formulas of lip tint on the latex to understand how their unique consistencies behave on “skin.” You can also draw inspiration from premium beauty services like lip blush tattoo to better understand how professionals approach color layering and precision. For a fun challenge, time yourself for quick application, simulating those moments when you need to refresh your perfect lip stain on the go.

    Integrating this practice into your self-care routine can be incredibly rewarding. Treat it as a calming, creative activity, a moment to yourself where you can focus on self-improvement in a tangible way. It’s an empowering step towards mastering your personal beauty style.

    Conclusion: Confident Lips, Confident You

    Practicing lip tinting on latex offers a transformative approach to mastering your lip makeup skills. It provides a unique opportunity to build confidence, achieve unparalleled precision, and save on product, all while enjoying a fun and mess-free learning experience. This DIY beauty hack empowers you to take control of your beauty skills, ensuring you can create any lip look you desire with expertise.

    No more guessing games or wasted product. Grab your latex practice skin, pick your favorite tint, and start practicing today! The journey to perfectly applied, effortless lip looks begins now. We encourage you to share your progress and favorite techniques in the comments below.

  • The Ultimate Guide to Waxing and Tinting: Achieve Your Perfect Look

    In the quest for effortless beauty, two services stand out for their transformative power: waxing and tinting. These aesthetic treatments have become immensely popular for their ability to enhance natural features, streamline beauty routines, and provide a polished, well-groomed appearance. Whether you’re aiming for perfectly sculpted brows, dark, voluminous lashes, or silky-smooth skin, understanding the benefits of waxing and tinting can help you achieve your ideal look with minimal daily effort. Join us as we explore how these professional services can elevate your beauty regimen and save you precious time.

    Unveiling Smoothness: What is Waxing and How Does It Work?

    Waxing is a highly effective method of hair removal that leaves skin smooth for weeks, significantly longer than shaving. It works by applying warm wax to the skin, which adheres to the hair. When the wax is quickly removed, it pulls the hair directly from the follicle, resulting in finer regrowth over time. There are primarily two types of wax used in professional settings: soft wax and hard wax.

    Soft wax (or strip wax) is applied in a thin layer and removed with a cloth or paper strip. It’s often used for larger body areas like legs and arms. Hard wax, on the other hand, hardens on its own and is removed without a strip. It’s typically favored for sensitive areas such as the bikini line, underarms, and face, as it adheres primarily to the hair and less to the skin, potentially reducing discomfort.

    Popular waxing areas include facial waxing (eyebrows, lip, chin, full face), as well as body waxing for legs, arms, back, underarms, and intimate areas like Brazilian wax and bikini wax. Beyond simply removing unwanted hair, waxing offers several compelling benefits. Firstly, it provides longer-lasting results compared to shaving, as hair is removed from the root. Secondly, consistent waxing can lead to finer, sparser hair regrowth, making future sessions less frequent. Lastly, the process exfoliates the skin, removing dead skin cells and leaving it feeling incredibly smooth and soft. Proper aftercare, including moisturizing and avoiding exfoliating too soon, is crucial for preventing ingrown hairs and maintaining skin health. Some common myths suggest waxing causes hair to grow back thicker, but in reality, hair often becomes finer and softer after repeated waxing.

    Define Your Gaze: Understanding the Magic of Tinting

    Tinting is a semi-permanent cosmetic procedure designed to enhance the natural color and definition of your eyelashes and eyebrows. Using a safe, specially formulated dye, this treatment darkens the fine, light hairs that typically go unnoticed, creating the appearance of fuller brows and longer, more defined lashes. It’s an excellent solution for those with brows or light lashes who desire a more noticeable eye frame without the daily application of mascara or brow pencil.

    The tinting process involves carefully applying a chosen color to the brows or lashes. For eyebrows, the esthetician will work with you to select a shade that complements your hair color and skin tone, ensuring a natural but enhanced look. For lashes, the tint makes them appear darker and more prominent, often eliminating the need for mascara. The results typically last between 3 to 6 weeks, depending on individual hair growth cycles and aftercare.

    When comparing tinting with other popular brow and lash enhancements, its unique advantages become clear. Unlike microblading, which is a semi-permanent tattoo technique, tinting is non-invasive and temporary, offering flexibility.

    For lashes, it offers a natural alternative to lash lifts (which curl the lashes) or extensions (which add synthetic hairs), simply deepening the natural lash color. Tinting is ideal for individuals seeking a low-maintenance, waterproof solution for enhanced eye features, perfect for an active lifestyle or a makeup-free look. A patch test is always recommended prior to the first tinting session to check for any sensitive eyes or allergic reactions.

    The Ultimate Brow Transformation: Combining Waxing and Tinting

    While waxing and tinting are powerful on their own, their combined effect creates a truly striking and harmonious look, particularly for the brows. Pairing these two services is often referred to as a “brow shape and tint” and is lauded for its ability to deliver a completely transformed, yet natural, aesthetic. Waxing meticulously shapes and cleans up the brow area, removing stray hairs to create a precise and defined arch. Tinting then adds depth and color, filling in sparse areas and darkening lighter hairs that might otherwise be invisible, thus maximizing the brow’s natural potential.

    The synergistic benefits of combining waxing and tinting extend beyond just appearance. This dynamic duo offers significant time-saving advantages. Imagine waking up with perfectly shaped and colored brows, eliminating the daily struggle with pencils, powders, or gels. The low-maintenance aspect makes it perfect for busy individuals or anyone who desires an effortlessly polished look. This combination creates a cohesive look that frames the face beautifully, enhancing overall facial symmetry and definition. Clients often report a significant confidence boost after experiencing this comprehensive brow transformation, feeling more put-together and ready to face the day.

    Is Waxing and Tinting Right for You? A Guide to Candidacy

    Waxing and tinting services are widely versatile and can benefit a broad range of individuals looking to enhance their natural beauty and simplify their routine. For waxing, ideal candidates are those seeking smooth, hair-free skin for an extended period, particularly if they experience rapid regrowth or irritation from shaving. Both fine and coarse hair types can be effectively waxed. However, individuals with extremely sensitive skin, certain skin conditions (e.g., eczema, psoriasis), or those using specific medications (like retinoids or isotretinoin) should consult with a professional and potentially their dermatologist beforehand. A professional esthetician will assess your skin and discuss any contraindications.

    Tinting is particularly beneficial for those with fair hair, sparse lashes, or thin brows, as it adds visible definition and depth. It’s also an excellent option for individuals with an active lifestyle or those who prefer a makeup-free look, as it’s waterproof and smudge-proof. While generally safe, a patch test is crucial for anyone considering lash or eyebrow tint to prevent allergic reactions, especially for those with sensitive eyes. Men’s grooming also increasingly incorporates brow waxing for a tidier look, and sometimes tinting for added definition. From pre-wedding beauty preparations to simplifying daily routines, waxing and tinting offer effective solutions for virtually anyone looking to refine their appearance.

    Your Guide to a Smooth Experience: Before Your Waxing & Tinting Appointment

    Optimal results and minimal discomfort from waxing and tinting depend greatly on proper pre-care and diligent aftercare. Following these guidelines will ensure a smoother, more radiant outcome.

    Before Your Appointment:

    • Hair Length (Waxing): For best results, hair should be at least ¼ inch long (about the size of a grain of rice). This usually means refraining from shaving for 2-3 weeks prior.
    • Exfoliate (Waxing): Gently exfoliate the area to be waxed 24-48 hours before your appointment. This helps prevent ingrown hairs and ensures the wax can grasp the hair effectively.
    • Skin Preparation: Ensure your skin is clean and free of heavy lotions, oils, or makeup.
    • Avoid Sun Exposure: Stay out of direct sunlight or tanning beds for at least 24-48 hours before waxing, as sun-damaged skin is more prone to sensitivity.
    • Patch Test (Tinting): Always request a patch test at least 24-48 hours before your first tinting session to check for any allergic reactions. This is crucial for avoiding adverse effects, especially around the delicate eye area.
    • Inform Your Esthetician: Disclose any medications you are taking (especially retinoids or blood thinners), skin sensitivities, or allergies.

    Aftercare for Lasting Beauty:

    • Avoid Touching: Refrain from touching waxed areas frequently immediately after, as pores are open and susceptible to bacteria.
    • Soothing Products: Apply a soothing, fragrance-free lotion or aloe vera gel to reduce redness and irritation.
    • Avoid Heat: For 24-48 hours, avoid hot showers, baths, saunas, steam rooms, and intense exercise. Heat can irritate freshly waxed skin.
    • Sun Protection: Apply SPF to waxed areas, especially facial areas, as skin is more sensitive to sun exposure.
    • Exfoliate Regularly (Waxing): Beginning 2-3 days after waxing, gently exfoliate 2-3 times a week to prevent ingrown hairs.
    • Moisturize: Keep your skin hydrated daily to maintain its health and softness.
    • Tinting Aftercare: Avoid getting tinted areas excessively wet for the first 12-24 hours. Refrain from using oil-based cleansers or makeup removers on tinted lashes and brows, as oils can cause the tint to fade faster.

    Finding Your Perfect Match: How to Choose a Quality Waxing and Tinting Salon

    The success and safety of your waxing and tinting experience largely depend on the expertise and professionalism of your chosen salon and esthetician. When entrusting your beauty needs to others, it’s vital to prioritize certain criteria to ensure a positive outcome.

    First and foremost, look for a salon with licensed estheticians. Licensing ensures that the professional has undergone proper training and meets industry standards. Experience is also key; inquire about how long the technicians have been performing waxing and tinting services. A reputable salon will have experienced technicians who can offer personalized advice based on your skin type, hair growth, and desired look.

    Hygiene standards are non-negotiable. Observe the salon’s cleanliness. Are tools sterilized? Do technicians wear gloves? A truly professional establishment will maintain immaculate conditions and adhere to strict sanitation protocols. Reading client reviews and testimonials can offer valuable insights into a salon’s reputation, service quality, and overall vibe. Positive reviews often highlight excellent results, friendly staff, and a comfortable environment.

    Reputable studios such as Hivivi consistently earn praise for their attention to detail and client care in waxing and tinting treatments.

    Finally, a good salon will offer a thorough consultation process. This allows you to discuss your expectations, ask questions, and for the esthetician to assess your suitability for the services, addressing any concerns like sensitive skin or allergies. Choosing a salon that prioritizes these aspects ensures not just beautiful results, but also a safe, comfortable, and professional experience.  

    Unlock Your Natural Beauty: The Lasting Impact of Waxing and Tinting

    Waxing and tinting are more than just beauty treatments; they are investments in enhanced self-confidence and streamlined routines. By providing long-lasting smoothness and defined features, these services help you achieve an effortless, polished look that saves time and boosts your overall confidence. From achieving flawless brows to maintaining silky-smooth skin, the combined power of waxing and tinting offers a holistic approach to beauty that truly enhances your natural allure.

  • Unlock the Secret to Fuller, More Vibrant Lips with Lip Blush Tattoo

    Are you tired of constantly reapplying lipstick or feeling self-conscious about pale or unevenly toned lips? Imagine waking up every day with perfectly tinted, fuller-looking lips that last for years. This isn’t a fantasy – welcome to the world of the lip blush tattoo, a revolutionary solution for effortless beauty.

    This cosmetic tattoo procedure is designed to enhance your natural lip color, perfect the shape, and boost symmetry, providing a subtle, beautiful, and long-lasting tint. Its popularity is soaring for good reason: it offers incredible convenience, stunningly natural results, and a major confidence boost, all without the worry of smudging or fading throughout the day.

    In this comprehensive guide, we will dive deep into everything you need to know about the lip blush tattoo. We’ll cover the benefits, explain the entire procedure from start to finish, detail the crucial aftercare steps, and help you find the right artist to trust with your smile.

    What Exactly is a Lip Blush Tattoo? Debunking the Myths of Permanent Lipstick

    A lip blush tattoo is a form of semi-permanent makeup. The core concept involves a skilled artist using a specialized cosmetic tattoo machine to deposit mineral-based pigments into the upper layer of your lip skin, the epidermis. The primary goal is not to create an opaque, heavy “lipstick look” but to provide a soft, natural enhancement. Think of it as your lips, but better – a delicate tint that restores color and definition.

    This modern technique is vastly different from traditional lip tattooing of the past. Old-school permanent lipstick often resulted in harsh, unforgiving outlines and used pigments that could change color over time. In contrast, cosmetic tattooing for lip blushing uses advanced pigments and a gentle, layering application to create a soft, pixelated effect that heals beautifully and can be customized to your ideal shade.

    The Transformative Benefits of Choosing a Lip Blush Tattoo: Beyond Just Color

    Deciding on a lip blush tattoo is about more than just adding color; it’s an investment in your confidence and daily routine. The benefits are numerous and can truly transform your appearance.

    Enhanced Natural Lip Color and Definition

    Lip blushing is perfect for correcting natural pallor in the lips, restoring a youthful vibrancy, and defining your lip border without a severe outline. The result is a healthy, subtle wash of color.

    Improved Lip Symmetry and Shape

    Few people have perfectly symmetrical lips. An experienced artist can use a lip blush tattoo to skillfully minimize irregularities, balance the shape of your cupid’s bow, and create a more harmonious and balanced appearance.

    Creating the Illusion of Fuller Lips (Without Fillers)

    While it doesn’t add volume like fillers, lip blushing creates a powerful optical illusion. By carefully defining the vermilion border and adding an even layer of color, lips can appear plumper and more pronounced.

    Long-Lasting Results and Convenience

    With proper care, a lip blush tattoo typically lasts between one to three years. This means you can say goodbye to daily lipstick application. Your lips will remain perfectly tinted and smudge-proof through meals, workouts, and whatever else your day holds.

    The Lip Blush Tattoo Journey: What to Expect During Your Appointment

    Understanding the procedure can help ease any nerves and ensure you’re fully prepared for your appointment. The entire journey is a meticulous process focused on safety, comfort, and beautiful results.

    Initial Consultation and Color Selection

    Your journey begins with a thorough consultation. You and your artist will discuss your desired outcome, lifestyle, and aesthetic goals. They will help you select the perfect custom-blended pigment that complements your skin tone and looks natural.

    If you’re curious about what this journey looks like from a real person’s perspective, you can explore Vivi’s personal beauty journey from client to expert, where she shares authentic insights into PMU techniques, lip tinting decisions, and the empowerment behind enhancing natural features.

    Numbing and Preparation

    Comfort is a top priority. Your artist will apply a strong topical anesthetic or numbing cream to your lips and let it sit for about 20-30 minutes. Once your lips are desensitized, the area will be thoroughly cleaned and sanitized for the procedure.

    The Pigmentation Process

    Using a sterile, single-use needle, the artist will gently implant the pigment into your lips. They work in layers, gradually building the color to the desired intensity. Most people describe the sensation as a light scratching or vibration, with minimal discomfort thanks to the numbing cream. The entire procedure typically takes between two to three hours.

    Immediate Post-Procedure Appearance

    Immediately after the session, expect your lips to be moderately swollen, tender, and the color to appear much brighter and darker than the final result. This is a normal part of the process, and the intensity will subside significantly during healing.

    Lip Blush Tattoo Aftercare: Essential Steps for Optimal Healing and Lasting Results

    Following a strict aftercare routine is non-negotiable for achieving the best color retention and preventing complications. Your artist will provide detailed instructions, which you should follow precisely.

    The Healing Timeline (Week by Week)

    The healing process for a lip blush tattoo typically spans four to six weeks. In the first few days, you’ll experience swelling and tenderness. Around day 4-7, your lips will begin to flake or scab – it’s crucial not to pick at them. As the scabs fall away, the color underneath may seem very light in what’s known as the “ghosting” phase. Don’t panic! The true, final color will bloom and settle over the next few weeks.

    What to Avoid

    For at least 10-14 days after your procedure, you must avoid sun exposure, excessive sweating, swimming pools, saunas, spicy foods, and direct water pressure on your lips. Gently cleanse the area as instructed and keep your lips constantly moisturized with the recommended aftercare ointment.

    The Importance of the Touch-Up Session

    A touch-up session, usually scheduled 6-8 weeks after the initial appointment, is essential. This session allows the artist to perfect the color, fill in any areas that may have healed lighter, and make any necessary adjustments to ensure your results are flawless and long-lasting.

    Frequently Asked Questions (FAQs) About Lip Blush Tattoo

    • How long does lip blush tattoo last? Typically, it lasts 1-3 years, depending on your skin type, lifestyle, and sun exposure. Color boosts are recommended to maintain vibrancy.
    • Does lip blush tattoo hurt? A topical numbing cream is used to minimize pain. Most clients report minimal to mild discomfort, often described as a light scratching feeling.
    • Can I still wear lipstick after lip blush? Absolutely! Once your lips are fully healed, you can wear lipstick or gloss over your lip blush for a more dramatic look whenever you wish.
    • How much does lip blush tattoo cost? Pricing varies based on artist experience and location, but typically ranges from $500 to $1500, including the initial touch-up.
    • When can I see the final results? The true, healed color will be visible approximately 4-6 weeks after your touch-up session.

    Conclusion: Embrace Your Perfect Pout with Confidence

    A lip blush tattoo is an incredible investment in yourself. It offers the unparalleled convenience of waking up with beautifully colored lips, enhances your natural features, and provides a daily dose of confidence. By restoring color, perfecting symmetry, and defining your shape, this procedure gives you a polished look with zero effort.

    If you’re ready to simplify your beauty routine and enhance your smile, the next step is to find an expert you can trust. We encourage you to book a consultation with a qualified and certified lip blush artist to discuss your goals and discover if this transformative treatment is right for you.

  • Hello world!

    Welcome to WordPress. This is your first post. Edit or delete it, then start writing!